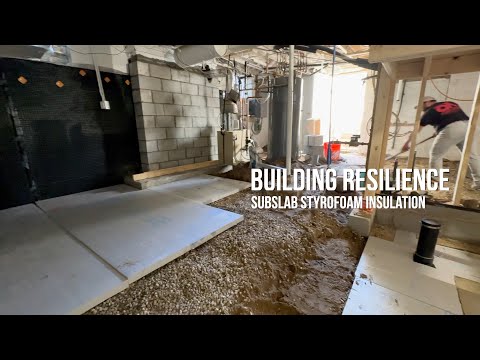
A dry and healthy crawlspace is sealed tightly against water and air leaks
The first step in a mold-free house is a dry patch of land to place your footing.
Five ingredients to a healthy and mold-free crawlspace:
1. Capillary break on top of footing disrupts wicking
Before building foundation walls on top of that footing, go the extra foot and paint the top with a capillary break, to prevent the walls from turning into wicks.
And keep those buckets of waterproofing handy, cause you’re going to paint the walls before backfilling, even if you add a dimple sheet.
2. Filling the cores of blocks reduces air leakage
Filling holes in concrete block provides structure, but also stops a lot of air leakage that can flow through the walls. As long as you’re filling the cores, stick some anchor bolts in there.
Inside, gravel and gravity work to prevent wicking, and continuous plastic above will combat bulk-water attacks.
But first, the mudsills, which sit atop a sill sealer gasket.
3. Seal gaps in mudsill early in the process
Before bolting them down, seal the gaps between the boards. These gaps MAY get covered by some other material later, but right now, they represent a direct path between inside and outside. A little bead of caulk can cure that right now.
This is probably more caulk than you need, but in animation-land, it doesn’t squeeze out and get all over your pants, hands, and boots.
It just sits there, perfectly sealing the gap. Now you can install the nuts on those bolts and get ready for plastic.
4. Bring plastic vapor barrier up to mudsill
A slick tip from Ray Williams, of Mark IV Builders is to spread scrappy beat-up plastic on the gravel before spreading the finish sheeting. This scrappy layer acts as a sacrificial layer, to absorb the brunt of the foot traffic during construction.
Floor plastic should drape over the floor, but also up the walls to the mudsill.
If you can’t get it all in one sheet, overlap the seams six inches and tape them with a high-quality construction tape.
5. Insulate the perimeter
Staple the plastic into the mudsill to hold it in place, and install sheets of rigid insulation over the plastic.
There are various ways to attach to the concrete walls, and you can also fasten directly into the mudsill.
Next, seal the gap between foam board, plastic, and mudsill with low-expansion foam.
Also seal the corners, including any gaps between foam boards, and go along the bottom of the insulation panels.
Now you’ve got continuous water, air, and thermal boundaries between the inside and the outside world.
—Ray Williams is a superintendent with MARK IV Builders in Cabin John, MD