Goin' down to the studs ...
When replacing windows in an older house, you have many options: sash replacement, tilt-in replacement window pack, full-window replacement, interior or exterior storm windows, and historic restoration.
That is too many things to talk about in one article.
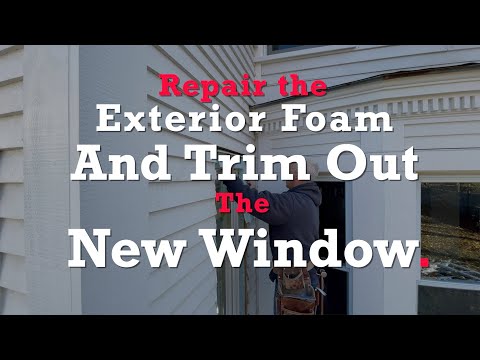
This post is about full-window replacement: removing the old window, along with the interior- and exterior trim, down to the rough framing. This often includes changing the size of the rough opening—either to change window types, frame a view, or just to let in more light.
Sometimes, the opening gets bigger, sometimes it shrinks.

What's the best way to replace a window?
The Building America program has been great for producing reams of publications on topics in home building that relate to energy efficiency and durability.
There are also virtual piles of information in other parts of the government: Energy Star (US EPA), NREL, PNNL, LBNL, ORNL and other National labs (DOE) as well as some nonprofits and media companies.
We're going to save you the trouble of sifting through all of it and boil down a few key publications into a quick guide for full-window replacement. Today we're synthesizing:
- Building America Solutions Center's Complete Window Replacement Guide (16 pages, public domain)
- ASTM’s 2112 Standard Practice for Installing Windows, Doors, and Skylights (87 pages, $82)
- NREL's Measure Guideline on Wood Window Repair and Replacement by Peter Baker at Building Science Corporation (94 pages, public domain).
(BTW, thank you to all of the people who figure this stuff out and make it available.)
Once-per-generation opportunity to improve your house
If the window retrofit is part of a siding replacement, it is wise to add a layer of exterior insulation to cut down on air leaks and to provide continuous thermal coverage. Insulation is a relatively cheap upgrade to an expensive siding project that happens only once every 50 years. And it makes a big difference in a home's energy performance.
Adding a layer of foam complicates the window installation, however, because it adds thickness to the wall and covers the nailing base to which you would ordinarily fasten the window. For details on how to install a window over exterior foam, see the illustrations below.
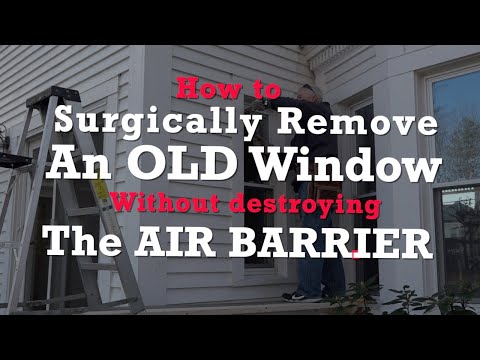
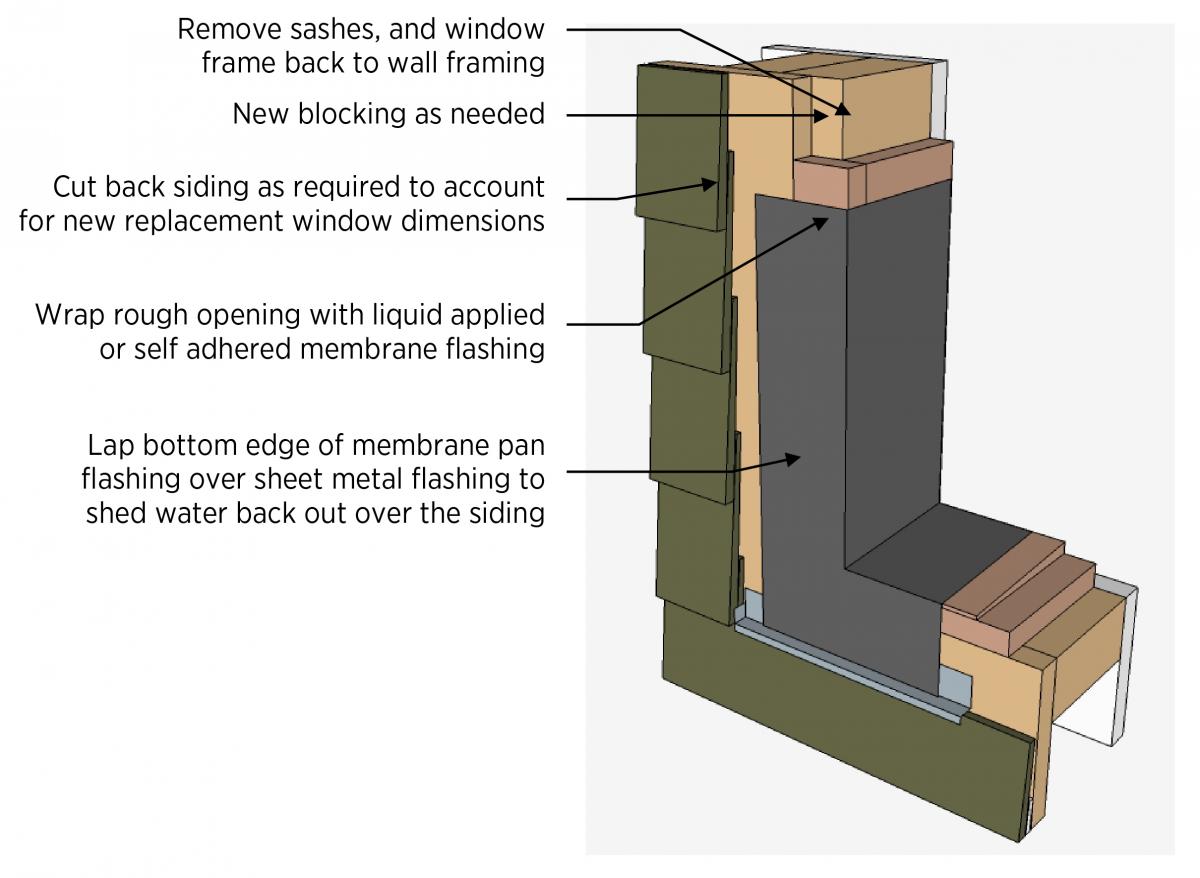
Cut into the wall carefully
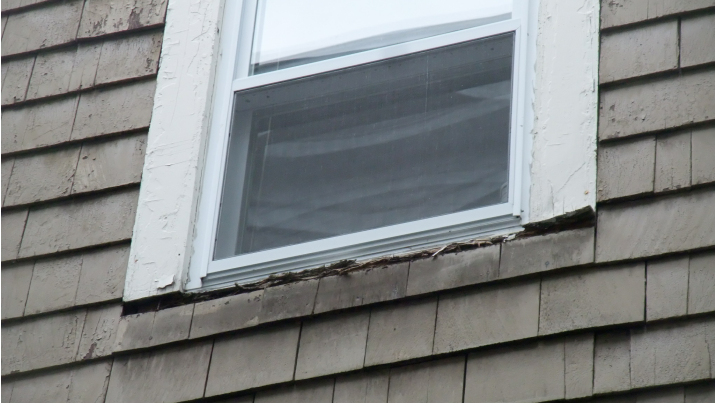
If you're not replacing the siding and the rough opening is changing, it is likely that the siding will need to be trimmed back. In doing so, be very careful not to damage the building paper, house wrap, or whatever weather-resistive barrier (WRB) is in place.
That thin strip of building paper (or house wrap or other WRB) is your lifeline to integrating a new hole in an old wall's existing drainage plane (which is buried under the siding) that has worked perfectly for the life of the building.
No pressure.
A couple of ways to protect the underlying paper come to mind. Most promising is to wedge a chunk of beveled siding or cedar shims under the edge of the siding but on top of the paper, then set your saw to a precise depth to cut the siding—and possibly to nick the shims—but preserve the paper. To do this you might want to tack a thin board to the house to support the saw bed and to keep it from changing depth dimension as it travels along the lapped siding.
For working behind brick, the challenge is mortar droppings. If they bond to the paper, you may rip the paper when removing small pieces of mortar, so work carefully. Stucco may have two layers of building paper: one as a bond break and the other as a drainage plane. Tie into the drainage plane (the innermost layer).
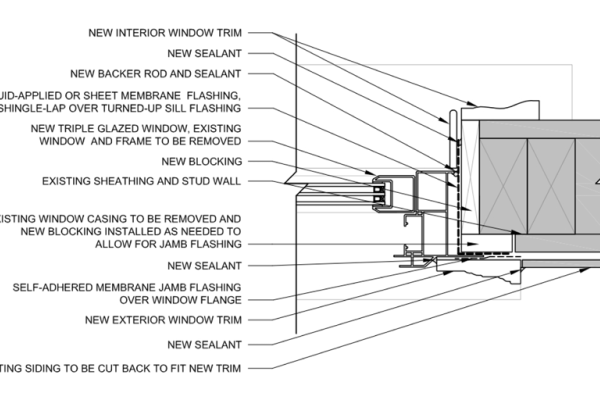
How to detail the window rough opening
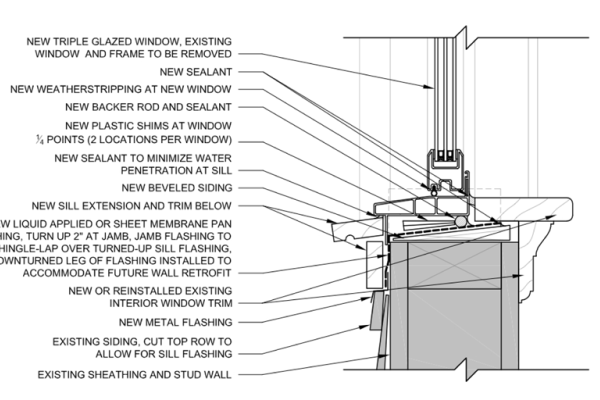
Here's how Peter Baker draws the sill plate once the rough opening is cleaned up (he illustrates padding the opening to fit a slightly smaller window):
Membranes, gravity, and drainage beat water (almost) every time
Not appearing in this drawing: the building paper that is buried under the siding—it would stay behind the peel-and-stick membrane used to wrap the framing.
Not pointed out in this drawing: the piece of beveled siding added to the sill to pitch it towards the exterior. Some carpenters slope the actual sill, but that is more difficult to execute than tacking down a piece of beveled siding.
A backdam could also work, but incorporating slope puts gravity on your team rather than straddling the fence. We'd rather have gravity on our team.
Either way, sloping the sill means that you'll need a taller R.O., to accommodate the slope.
Over the sill is some sort of pan flashing—either fluid-applied membrane, peel-and-stick flashing tape, or a pre-manufactured pan flashing product. If you use peel-and-stick membrane or flashing tape, make sure to lap the joints shingle-style—sides over the bottom, top over the sides—and integrate with the aforementioned and missing WRB.
#gravityalwaysworks
Baker adds a metal flashing below the window to push any water getting past the new work outside of the existing work. This is a nice addition—especially if the window in question is on the second floor or higher and there are more windows below it.
Go to the sources:
- Building America Solutions Center's Complete Window Replacement Guide (16 pages, public domain)
- ASTM’s 2112 Standard Practice for Installing Windows, Doors, and Skylights (87 pages, $82)
- NREL's Measure Guideline on Wood Window Repair and Replacement by Peter Baker at Building Science Corporation (94 pages, public domain).