This video shows how to tune up a Tapco Pro 19 brake using a Tune-Up Kit 10819 from Tapco Tools. This tuner-up kit is suitable for Tapco brakes from 8 feet to 12 feet, 6 inches long. Here's how to tune up a Tapco Pro 19 brake:
1. Remove rubber pin keepers
- Use a slotted screwdriver to push into the end of the pin and peel it out of the slot.
- Open the brake.
- Use 1/8 in Allen wrench to push the pin out of the hole. The 1/8 in size is easy to slip in through the casting, and if it is stubborn, you can tap it with a hammer to knock it out.
- Slide the pins out with the screwdriver.
- Slide in the new pins (five per side).
- If you’re right-handed, line the pins up at the right ends of the openings (one per side).
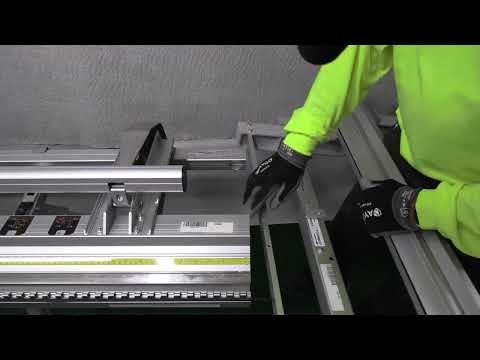
A 3/16-inch Allen wrench comes with both the kit and the brake. Use the Allen wrench along with a 7/16-inch open-end wrench to loosen the bolt holding the knuckle.
2. Install the power links
- The bottom block has a reverse thread. Snug it up with the Allen wrench.
- The upper link has a standard thread. Screw it on until it is about one thread apart.
- Slide the block into the frame and slip the bolt through the holes.
- Install the nut on the other side.
- Tighten with an Allen wrench and 7/16 inch box-end wrench until it just passes the Nylok: this will leave the link loose for movement.
- Do this for all of the castings.
3. Remove and replace the vinyl strip
- Use pliers to grab the strip at one end and pull it off from that end.
- To slide the new vinyl strip on, lubricate the slot with WD-40.
- Line up the ball end of the vinyl strip into the cylindrical slot.
- Grasp the end with pliers, and pull and feed the vinyl strip simultaneously.
4. Replace the handle
- Make sure all of the knuckles are facing up.
- Starting in the center, slide the pins through the holes in the handle. Use a screwdriver to slide the pin through the center hole on the top of the link.
- Repeat this for all knuckles.
- Replace the rubber pin keepers on either side of the pins. Slide them up to the pins and press them into the slot.
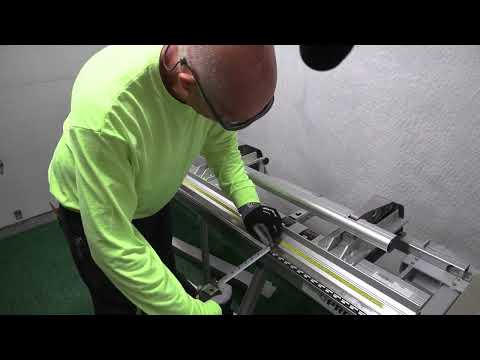
5. Adjust the brake
- Cut five cards of aluminum coil stock and slide them in at each casting.
- Lock the brake down. Tighten down each casting with the Allen wrench until it is just tight enough that you can’t pull it out.
- Work your way down the brake until it is consistent.
When all five castings are adjusted to equal holding power, you're ready to get back to work.
—This video is from Tapco Tools, one of ProTradeCraft's advertisers. Serving professional siding applicators since 1961, Tapco brakes and accessories bring measuring, mobility, decorative designs, and strengthening ribs to fascia, window trims, frieze boards, porch posts, and beams. See all of Tapco's content here.