In this video, Neil Paskin demonstrates how to make simple but sturdy steel boxes with crisp corners. They only take 10 minutes to make, and even less if you make a run of them. Once you've made the simple jig, they're super easy to make.
Mr. Paskin made this one a while ago. It lives under his fly press, and he keeps small scraps of handy steel in there.
In his last video, Paskin made a tray to hold a pitch for metal chasing, and he also made a shadow box to house the finished artwork and display it.
Anyway, Neil is using 1.6mm or 16 gauge steel, which is perfect. It's pretty thick, but it's not too thick, so it's sturdy but not ridiculously heavy. And even though it isn't super thin, to fold it, it doesn't require any specialized equipment like a bending brake.
And as you can see, that's a nice, crisp corner with very little effort.
To make them, Mr. Paskin uses a metal-cutting circular saw.
Cutting the Steel
But stick with him as there are other options. You could take a metal cutting blade like this one and put it on a regular wood-cutting circular saw, and it will work fine. And just to show that, Mr. Paskin will put the blade onto his saw and give it a go.
He wouldn't do this with his best saw, even though he is doing so here. But he's just doing it to show it can be done, and he's only making a couple of cuts. But if you have an old saw or a cheap one that you're not too worried about, that would be the go.
Anyway, this is three-millimeter thick steel, so it's a good test. And it's about twice the thickness that you'll be using to make the boxes.
Apparently, the motor housing isn't sealed on a wood saw, so Mr. Paskin reckons if you blow all the chips out regularly, it should be fine. But obviously, a dedicated metal cutting saw would be the best option.
It did that with no worries at all, and it left a super clean cut.
Making the Box
The first thing to do in making the box is to cut out a square or rectangle. And Mr. Paskin measures, marks, and clamps a straight edge. It works, but he's going to make a new jig.
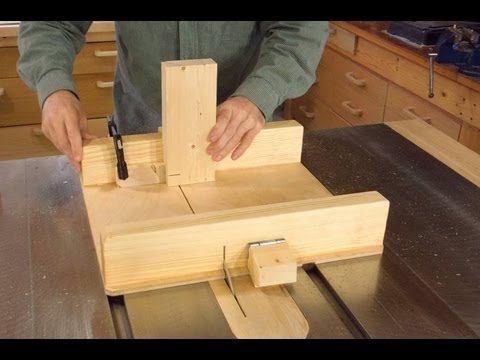
This is the original one, and he's going to improve on this and add a feature where he can cut out the square or rectangle blank. It'll be faster and more accurate, and he'll quickly tell you about this jig.
It makes a shallow groove where the sides fold up from the base.
Cutting Plywood
Mr. Paskin made plans and jotted down a cut list, so he'll cut the pieces from 12-millimeter or half-inch plywood. He's using form ply because he had a couple of pieces that were just the right size, but any plywood that's fairly flat will be fine.
That's all of those pieces done, and he also cut a couple of braces from 19mm or three-quarter inch plywood. And the reason he uses three-quarters of an inch for the braces is there's a bit more thickness to screw into. You could also use something else, like pine studs.
He made the top in two pieces to leave a gap for the saw blade to drop into.
Making the Fence
You could make the top in one piece and then cut that kerf in, but these metal cutting saw blades really don't like cutting wood.
Next, he'll make the fence. And he's using this 40mm strip of plywood. He'll also use a couple of small pieces of 3mm plywood to raise the fence up to let the box blank slide underneath to help line up the fence. He cut a strip of plywood, and the width of that is the distance between the blade and the edge of the saw base. And this will also be useful later on when he uses the jig to make the boxes.
This next piece is another fence, and it's for cutting the blank square and to size. And this needs to be accurate and square to the fence that he's already put on. Mr. Paskin will nail it to hold it in position, and then he'll add screws afterward. It also needs to be just forward of the 3mm plywood pad that he used to raise the fence.
He also decided to continue the fence through to the other side. It's looking good, and all set to try out, so he'll cut a couple of blanks ready for making boxes. It's just a case now of making one mark and lining that up with the blade kerf in the jig.
The form ply he's using is super slippy, and it may not have been the best choice, but anyway, he'll have to clamp it down, and it's probably not a bad idea anyway, as it only takes a few seconds.
Cutting the blanks
Mr. Paskin will cut two blanks from the strip, and for no real reason, he'll set a stop to keep them the same size. He can't see why you couldn't use a grinder with this jig instead of the saw. You could run the back of the guard on the grinder against the fence, and it wouldn't be as accurate as this, but he thinks it would work.
He loves it! They came out perfect, and he reckons this jig, as it is, just for this purpose, would be worth making, but he'll make it even better yet.
He wouldn't be able to use the old jig to put the pieces square, as the fence that cuts the side is fixed, and it'd be in the way. The new jig will have a removable and adjustable fence, and he was going to make it from this 3mm plywood, and that would have been fine, but he's decided to make it from some of the 16 gauge steel.
He'll drill two holes and cut the section between to make a slot, and he'll do that on either end, and they'll be for adjusting the fence to hold the fence down. He'll use these knobs that he salvaged from an old jig, and they'll be held with t-nuts.
He'll center the fence by eye and then mark and drill through holes, and the t-nuts will be fixed from the back.
He's nearly there. He just needs to add one more thing.
Adding a stop
When he's cutting grooves for the box sides, he has to hold the blank tight against the fence. And if you're not careful, it can quite easily move. To help with that, he'll add a stop, which is just a countersink bolt, and he'll fix that with a threaded insert. For the insert to go low enough, he needs to drill a slight recess first. This will let him push in two directions, which will be a firmer hold and easier to keep planted.
That really is it. It's all finished. He just needs to knock the burs and corners off these blanks so they sit nicely up against the fence of the jig. That takes no time at all, but it was worth it.
Now, he'll use these old calipers to mark the depth of the box side, and he'll do that down one edge of the blank. He's decided to make the second box into more of a tray, so he'll mark that one, too.
Now, he'll use the plywood strip that he mentioned earlier to set the adjustable fence. To set the adjustable fence, he'll line up the edge of the strip against the mark that he just made with the calipers and lock the fence down.
It's essential that the adjustable fence is parallel to the main fence. He double-checked it, and he made an adjustment off-camera.
**He'll adjust the blade height on the saw by holding the steel up to it and just adjust it by eye.
He's aiming to set it to cut at least halfway through, but obviously not all the way through or leaving it too thin. It isn't a bad idea to make a test cut first. Let's give it a go.
That countersink stop worked great. It really is much easier to hold it down in place. He has the compressed air ready, and he blows out all the chips before making each new cut. It only takes a couple of minutes, and it's super easy to do.
He should probably attach some rubber to the underside to stop it from moving around, but other than that, he reckons it's awesome.
Cutting the corners
Next, he needs to cut the corners off, and that's very easy to do, too, as they're already marked out, and they're already cut halfway through. He'll do the first one with the grinder, and it works great as it seems to follow the shoulder on the side that he's cutting. It takes about a minute to do the one box.
His preferred way is with the bandsaw. It makes less dust, but either way works. And he reckons it would only take a couple of minutes using a hacksaw. The one that he cut with the grinder has burrs on the back, but they come off very easily with a file. And the bandsaw one was pretty clean as it was.
Bending the sides
To bend the sides, he'll just use the vice, and it really is super easy to do. He did have it a bit low in the vise on that first bend, so he lifted it up slightly. If he was to make a box that was much bigger, instead of using the vise, he'd clamp a piece of wood or steel over the side and at the edge of the workbench and lift up the blank.
He checked that the corners were square, and if any of the sides needed bending a touch more, he made adjustments. The easiest, fastest, and best way to finish the corners is to weld them. It really takes very little time. But if you don't weld, you could make small corner brackets and rivet those onto the box.
A bit of grinding, and they're all done. They're super strong and light enough too, and the corners are nice and crisp. He reckons they're pretty awesome, and they can have many uses.
If he'd thought about it, he could have used the one box to fit the other one as a lid. He also plans on making drawers for two or three different projects coming up soon, and he may make a quick video of these small organizer drawers.
