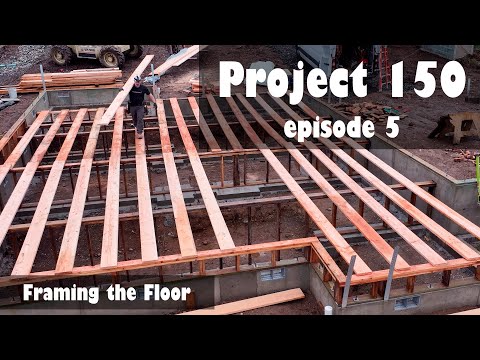
With the ledger bolted to the house and the beam in place, it’s time to set some deck joists, which begin with laying out the beam to match the layout on the ledger board.
Lay out the beam for deck joist placement
Rick works his way down the beam one way, making marks, and works back, squaring off the layout marks, indicating which side of the line the joist will sit with an X.
After the joists are tacked in place, they’ll add joist hangers, but first, they set an outer joist and use it as a brace to square up the beam.
It’s not structurally critical, but Ben likes to build things as if he cares, so they do this.
Look at this show for accuracy. Notice how many times Rick misses the nail he is swinging at.
None. He doesn’t miss at all. Now THAT’s hitting the nail on the head.
Spread the deck joists and set them in place
To set the rest of the joists, Rin places it with the top flush with the flashing and then toenails it through the top of the joist into the ledger.
Don’t walk on them yet, guys. Rick used a lot more nails on the first one because they were using it as a brace for the beam. These only need a toenail to hold them in place until they install joist hangers.
Jopists are crowned up and tacked in place.
At the other end, they are toenailed into the beam.
Before Ben paints himself into a corner, he works his way out. This last joist is too close to the wall to fit a nail gun, so he installs this joist hanger before the joist.
And before installing the joist, he bolts the side ledger to the house. Now he can slip that last joist into place and jail it off.
Install joist hangers after deck joists are installed
Now he can spread the joist hangers across all of the deck joists
When installing, this is where the little toenail comes in handy. Toenails are great for adjusting the placement of a framing member. Positive placement nailers make much quicker work of this than tico nails and hammers do.
Blocks go between the deck joists
As he works his way down the line, Rick is cutting blocks to install over the beam between the joists. OK, here’s a great reason to keep your hands away from the nail zone. This nail hit something hard and curled 90 degrees, shooting out the side of the block.
He toenails one end into the joist and face nails the opposite end. Now he can toenail the rest of the block.
With the blocks in place, Rick cuts the joists to length. One advantage is that you can cut the length to perfectly match the decking width.
Snapping a line and marking the joists after they’re installed is a good way to make sure the outer rim is straight.
Or at least as straight as the carpenters can cut.
Which looks to be perfectly straight in this case.
Install the rim joist to the ends of the deck joists
Speaking of the rim joist, it’s time to add that now.
They look for a relatively straight plank to start with, but regardless, Ben is going to end up working one end with a nail gun while Rick drives the other end up or down to flush it up at Ben’s end.
Inevitably there will be a problem joist, which may be squashed into submission with a clamp.
And secured with framing nails.
Anchor the railing posts into the rim/deck joist assembly
The last thing these guys are going to do this morning before taking a coffee break is to install the posts.
The local inspector, who has been really cool up to now, wandered by the other morning and told Benm he’d need to ass a bunch od brackets to each deck post, so the guys are doing that.
The post is sandwiched between two blocks and a joist.
There’s also a little block below the bracket, but they’re not gonna fasten that home until the bracket is set.
Tony pokes the carriage bolt through, slips the bracket on and gets the nut started, and tightens it home, before screwing the bracket into the little block at the bottom.
So that’s one post down and about seven to go before this deck is ready for decking.