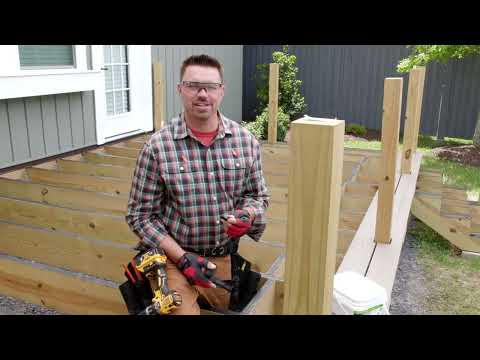
Hey everybody, my name is Chris, and this is my shop partner Uth. In this video, I'm gonna be building a set of truck bed drawers. Now, I built this same set over five years ago; now, it's in the back of my truck, still works perfectly fine. But I really wanted to make a nice quality video and plans to share with you all. The plans, which are on my website, will help you build the drawers to fit any size truck bed you have or even SUVs. Let's get started with the building.
These truck bed drawers are for a six and a half foot truck bed
So I have a standard six and a half foot bed in my truck, and I'm gonna make my drawers around six foot three inches to give me a little bit of room for the T handles that I'll put on at the end.
Now, I made a straight line guide for my circular saw, and I'll clamp it down to the sheet of plywood on my line. And I'll get a really nice straight cut that way. I'm using half-inch plywood for both the top and the bottom. And if you plan on putting super heavy stuff on top, you might want to go with the 3/4 inch piece.
Build the frame with 2x8, 2x10, or 2x12s
Lay out and drill countersink screw holes into the plywood top and bottom for the frame. I'll be using 2x8s to make my frame, but you can make the drawers taller by using 2x10s or even 2x12s; that's up to you and what you plan on keeping in the drawers. Place a screw about every six inches.
Cut 2x8s to span the whole four-foot width of plywood at the back of the drawer box, and scribe the longer pieces to fit tight tpo the back and flush with the front of the plywood top and bottom.
The three long 2x8s (one on each end and one in the middle of the plywood) and solid back sandwiched between the top and bottom will form two drawer pockets. And then I just screw the frame in place.
Build drawers to fit inside the drawer pockets
Now I'm gonna make the drawer bottoms. I'm using quarter-inch ply for these, and I'll set the sheet on top of the frame to get my layout. I'm gonna cut these about a quarter inch shorter than the frame because later on, I'll add stop boxes to the back of the inside of those doors.
For the drawer width, I measure the frame opening and then subtract half an inch. That's going to give me a quarter-inch gap on each side, which is what we want, and you'll see why a little bit later on.
Now I'll use my table saw to rip some 1 by 8 pieces of pine down to 6 inches wide to make my drawer sides. If you don't have a table saw, you could just use your circular saw, but I wanted to show some different methods. Using the drawer bottom as a reference, I'll mark and cut the long sides. Then I'll measure the inside distance and cut the front and back.
A lot of plywood comes with a good and bad side, and I wanted the good side, which is also the smoother side, down on these drawers as they'll be sliding on glides. So I'll flip the drawer bottom over and countersink all the holes from the underside.
Add carpet before assembling
But before I attach the sides, I'm gonna put down some carpet. This stuff is really cheap indoor/outdoor carpet that works perfectly for this, and it keeps your stuff from banging all around. So I rough cut the carpet to shape, then spray some spray adhesive to keep it from moving around while I screw down the sides. With the sides attached, it's really easy to trim the carpet.
Now I want to strengthen the doors a little bit, and I'm going to do this by taking a 4x4 and cutting it diagonally and then screwing that into the corners. This will also add some extra material that I'll need for my locking mechanism that I'll make later on.
Then I like to take a sander and round over all the edges. This will ensure the drawers slide in and out really nicely.
Drawer glides made from UHMW plastic work well
Now to make the drawer glides, I ordered a one-foot by four-foot sheet of 3/16 UHMW plastic to make the glides. I cut the sheet into 1-inch strips that I'll use for the glides. UHMW has very low friction, is very wear-resistant, and is self-lubricating. It's the perfect material for this application.
I use a drill press to get the exact depth on some countersunk screw holes. You can use a handheld drill here, but since these are such thin strips, it can be really easy to accidentally drill straight through them. Since the drawers will be riding on these, you definitely need the screw heads to be below the surface. I like 3/16 because it's thick enough that I could still get a small half-inch screw into, but it's not too thick where I lose drawer space. To help the drawers slide even better, I add some wax to the underside of the drawer and then give them a little weight test with Uhts.
Drawer guides, stop block, and a locking mechanism
Then I add a couple of guides to the sides of the frame and the back of the drawers. This is why I made the drawers a half-inch narrower than the opening. And then I'll add spacer blocks for the back of the drawers so that the drawers will push in flush.
Using the plywood cut-offs from the bottom, I'm gonna make the drawer fronts. I want these to be slightly shorter than the full height of the drawer so that they'll slide under the overhang that I create when I put the top on and also not too low that they catch on the tailgate when you extend them. I line them up and hold them in place with clamps and then just screw them to the door.
Next, I'm gonna work on the locking mechanism. Now I just went down to my local truck topper shop and was able to buy T handles with matching keys to the T handles that are already on my topper. Then I just use this little extra part that it had to mark out the hole locations, and then I'll drill those.
Reinforce the T-handles with quarter-inch steel brackets
These little T handles are not very strong. So I'm gonna fabricate something just a little bit better. I make these little marks every one inch to tell me where I want to bend. Then I'm going to drill a hole in the center and then out on each wing, and you'll see why in a second. File the center hole square so that it fits over the square shank of that T handle.
Cut off the arm of that little locking piece that comes with the T handle and use it to secure that new fabricated piece in place. Now, attach some quarter-inch steel rod to that piece that I made so that it extends through the drawers and into the sides of the frame for a super strong method of locking.
Put a 90-degree bend in one end, drill a small hole through it, and then add a cotter pin to secure it in place. This is the exact thing that I did to my original set of drawers that I built nearly six years ago, and I've never had a single problem with this mechanism.
Align the locking rod to the frame using lipstick
Next, I line up where I want the rod to come through the sides of the drawer to line up with the T handle. Drill a hole that's the next size up from quarter-inch and go all the way through the drawer. Then from the inside of the drawer, I'll drill a half-inch hole about halfway through. The rod doesn't travel in a straight line in order to lock, so you have to enlarge that inside to give it room to pivot as it extends.
It also requires a little bit of filing and bending of the rod to get it tuned up just right, but once it is, you'll never have to mess with it again, and someone will have to take an ax to the drawers to get them open.
Cut the rod flush with the side of the drawer when it's in the unlocked position.
Now I need to drill a hole in the frame that matches up with this rod, and I'm gonna show you a little trick that my grandpa showed me, but it involves some lipstick. So let me go get some of that real quick.
So you take some lipstick, put it on the surface that you want to transfer the mark, bring this in, shut the drawer, and push it out. And there you can see it made a really nice mark where I need to drill that hole. Now all I need to do is sneak that lipstick back into my wife's drawer, and everything will be good. Then I just add the cotter pins, and the locking mechanism is all done.
Drawer dividers protect the locking mechanism
Then I'm gonna lay out and install a bunch of 1x6 drawer dividers based on what I plan on keeping in my drawers. The way you layout your drawers is totally gonna be up to you. I do recommend putting a board across the front to block items from interfering and jamming up that locking mechanism.
Cut the top about three-quarter inches longer than the frame to give it a nice overhang over the door. And again, I'm gonna add a screw about every six inches.
Now, the front edge of these drawers get a lot of abuse from stuff getting thrown in all the time. So I'm going to add a small half-inch aluminum angle to the front edge. Now, I decided to route a small channel so little sit flush, and I experimented using rivets to secure it. Surprisingly, they worked really well.
For the top, I'm going to be using that rubberized coating called flex seal. It's basically like tar, and it'll give it a really durable waterproof coating. I have also used patio and walkway paint before that worked really good, and you can even go and get it coated with professional truck bed Rhino-liner if you want.
Add handles to take the load off the T-lock
Then I add a couple of heavy-duty handles because you really don't want to be pulling this thing out and pushing it in by the T-handle lock. Now I'm going to add a couple of metal brackets to the sides so that I can add some extra pieces of painted plywood to give it a nice flush front once it's sitting in the bed of the truck. The other nice thing is that now it gives me four nice little cubbies in front of and behind each wheel. I don't understand why this is, but the tailgate on my newer truck angles up higher than the bed. It's not on the same plane. So I have to add these half-inch spacers to the bed so that the drawers have enough clearance to clear the tailgate. My older truck didn't have this problem, so you may or may not have to do this.
Then to keep the drawers from sliding around, I use four screws through the bottom of the drawer into the bed of the truck. Now make sure there aren't any wires where you're screwing, and also use a screw that's just barely long enough to make it through. And here you can see that the tailgate of the truck will actually support the weight.
Materials List
- This list is for drawers that I made for my standard 6’ 6” bed. You might need to alter the materials if you are building for a different sized truck bed or SUV. Total cost for me was around $400.
(4) 2x8 8 foot boards for frame
(2) 1/2” sheets of plywood for top and bottom, you can go up or down in thickness as well - (1) 1/4” sheet of plywood for the drawer bottom
- (5) 1”x8” 8 foot pine boards for drawer sides
- (4) 1”x6” 8 foot pine boards for drawer dividers
- (1) 4”x4” 8 foot pine post for making drawer side reinforcements
- (1) 4’ wide roll of indoor/outdoor carpet. They usually come in 12’ sections that they cut back in the carpet section
- (2) 1 lb boxes of (1 5/8”) or 2” drywall screws
- (1) small box of small ½” screws, used for screwing uhmw down
- (1) 1lb box of 2 ½” screws for screwing the 2x8s together (really you only need 8 screws for this)
- (1) 4’ ½” aluminum angle iron, to protect front edge of top
- (1) ¾” galvanized steel flat bar, for making locking mechanism
- (1) ¼” steel rod for locking mechanism
- (4) small cotter pins, for locking mechanism. They come in 3 per bag
- (4) Heavy Duty Handles
- (1) Can of Flex Seal or heavy duty exterior porch/walkway paint
- (4) L brackets for mounting flush boards to drawer frame once in the bed of truck
- (1) 3/16” thick 12”x48” sheet of UHMW
- (2) truck topper t-handles, order at your local topper dealer