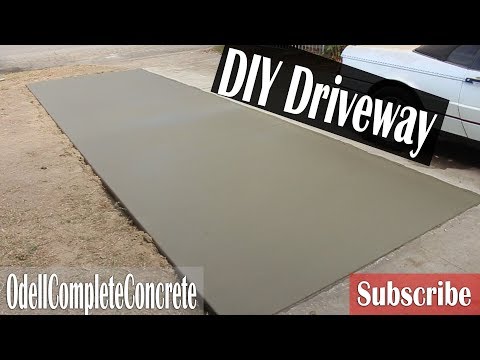
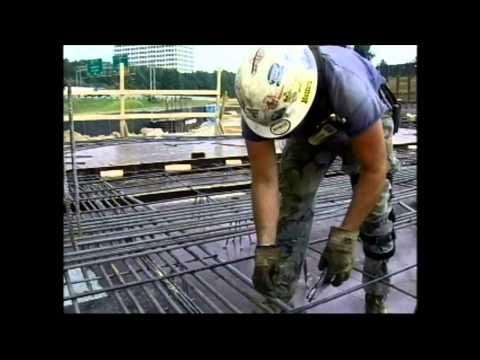
This video about pouring a concrete driveway comes from Fernando Pagés Ruiz, our Latin America editor currently reporting from Texas, where he lives. Pointing out best practices and code sections, it illustrates the right way to replace a concrete driveway. It also highlights a rebar practice that many concrete installers get wrong: forgetting the rebar chairs.
Official Transcript:
This video begins with a stroll down my block in Houston, Texas where I can't help but notice the sorry state of so many driveways. But amidst the sea of crumbling concrete, my neighbor stands out. He's in the process of replacing his driveway, and I couldn't resist the opportunity to find out why.
"What's your name, neighbor?"
"My name is Michael Crosno, and I'm the owner of this beautiful establishment."
"What crazy idea was it to replace your driveway? Wasn't it good enough the way it was?"
"It wasn't good enough the way it was. I'm getting old, so I shuffle like an old man. I was afraid I was going to trip and, uh, afraid that maybe one of my neighbors might trip. So, it's time to get rid of the old and bring in the new."
"So why are the driveways so messed up in our neighborhood?"
"I think it's a combination of age, trees, and floods. How many floods here?"
"I think, uh, in the last 35 years, there have been like five major floods. Yeah, especially in this neighborhood, 'cause in this neighborhood, we've had three major floods since Harvey. Because of the developer floods."
"Wow, but you had Ike and a number of other major rainstorms, and you've got the growth of the trees. Those are 35-year-old pine trees, and they have a lot of roots. And Elm trees and Oaks, they're ours have just torn up everything."
Old driveway demo with a skid steer loader and shovels
Before the new driveway, the old ones got to go, making way for a fresh start. Concrete forms are set up on the edges, and half the driveway is reinforced with 3/8 inch rebar. You see Juanos tying off the rebar with wire to hold it in place during the pour. You'll notice the powder sugar; it's hydrated lime. Lime is sprinkled across the area to help dry the soil and enhance stability. Quick lime or hydrated lime helps dry out the ground and in the case of expansive soils that swell, it will help stabilize the surface. However, you need more lime than what we have here, and it needs to be worked into the top layer, not just sprinkled like Baker's flour on top.
Note how Eduardo pins the rebar about 3 or 4 inches into the garage and house lap so the driveway will not lift or sink at the threshold.
Rebar chairs place steel correctly in concrete slab
The following day, the crew readies their tools for the concrete pour. The action begins when the concrete truck arrives and backs up the driveway. The pour begins with only half of the rebar in place so the truck can roll up the driveway without running over the steel. I asked the driver about his concrete mix. In the drum or concrete mixer that spins to combine the sand, rock, and Portland cement, the mix in the truck is sand, 3/8 inch rock, and five sacks of cement per yard to yield a rating of 3,000 PSI or pounds per square inch of strength. This is suitable for driveways in a temperate zone like Houston. Driveways should use between 3,000 and 4,000 PSI concrete.
Juan covers uses a concrete placer to push the mix around and spread the concrete evenly. The rebar is picked up as they go, a common but incorrect practice. It should be placed on spacers or rebar chairs to meet the building code requirements. According to building code R 506.2.4, reinforcements should be supported within the upper 1/3 of the slab during concrete placement. But what these fellas are doing, a standard practice and an instance where 'this is how we've always done it' is wrong. The intention is good, but the method is not effective. As the guys work the wet concrete, they step on the rebar, which may not end up where it's supposed to be in the top half of the slab.
Proper rebar placement involves using spacers like these. These spacers or rebar chairs hold the steel reinforcement in place throughout the pour. The guys use a 16-foot aluminum screed to level or strike off the concrete. The straight aluminum bar removes excess concrete and gives the top surface a proper grade. It's an important step in the operation because it will determine how even the driveway surface is and how well it drains.
Screed a flat surface during the concrete pour
"You always want the concrete to be a little high so you have something to strike off to a level surface. It takes practice to develop the coordination to pull the screed together and kick your feet back with each step to fill in the holes left by your boots."
One cus uses a handful to smooth the wet concrete surface while it is still wet. The first finishing step is the long, smooth strokes of the bull float. Jose irons out the wrinkles and seals the surface using aluminum extension poles for reach. Since the concrete is still too wet to walk on, the bull float leaves a nice even line if the screeding is done well.
The Ready Mix truck pulls out as the guide installs rebar for the second half of the driveway. The truck backs in, leaving one lane of traffic open to pour the second section of the driveway. As the second pour begins, notice Jose's hand gesture. Workers use universal signs to tell the driver what's needed: a circle motion to start the drum and pour the concrete, signs to back in, lower or raise the chute, and a fist to stop.
There was almost enough concrete to finish the job on this second section of the pour, but not quite enough, so Buur ordered another 3 yards of cleanup load to finish the job. The crew rests, waiting for excess water to evaporate and the concrete to set. After a well-earned rest, the crew gets back to work on finishing and polishing the concrete.
Power trowels push aggregate down, forcing slurry to the surface
The power trowel is used for a rough finish when the concrete hardens enough to walk on, but a power tool will not give the fine surface required. So Jose uses a steel finishing trowel to polish the top of the driveway, using kneeboard sliders for easy movement. An airplane groover on an extension pole is employed to create control joints. Control joints create weak points in the concrete where it will crack so the surface does not fissure in a random pattern. However, the control is not absolute. Concrete will still crack in weak spots such as curbs; however, the rebar will hold the driveway tightly together so it will not separate more than a hair.
Edges are sculpted to perfection, and a fine broom finish adds texture to the surface. As the work nears completion and the crews begin packing their tools, Mike grills some wings for the crew on his neighborhood-famous smoker.
The driveway appears finished but needs time to cure enough for heavy traffic. In just three days, it will be ready for a thrilled homeowner to enjoy their beautiful new driveway.
"It's usually about 3-4 days before you can put a light passenger vehicle on a freshly poured driveway. It takes a full 28 days to completely cure. But light passenger vehicles shouldn't do any damage."
"Looking quite beautiful. Look how white it is. Very big improvement. The driveway is taking on a nice uniform color. There's still a bit of a darker spot where there was a very wet spot in the dirt underneath the driveway, but otherwise, things are looking really nice, uniform, beautiful, clean white color. Neighbor's going to be very happy with these results."
And that's not all.
Afterward, I asked Mike if he was pleased with the results. Let's hear what he had to say:
"Well, neighbor, the driveway looks absolutely fantastic. How do you like it?"
"I think it's pretty nice. It's very white because it's brand new, and I think Cordova Concrete did an excellent job from the very beginning of the tee-out all the way through the finish. I think it's going to last at least my lifetime."
And there you have it, a glimpse into the driveway replacement process. We hope this has been informative and gives you an idea of what to expect if you ever need to replace your driveway.


