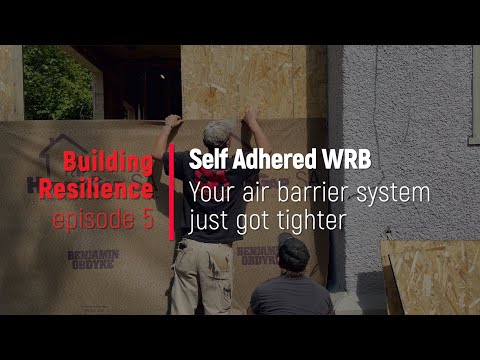
Resilient building and design begin with the right products installed the right way—in a way that builds resilience for the home. The Building Resilience Show highlights resilient products, resilient design, and resilient construction, like self-adhered weather-resistive barriers (WRB), like Hydrogap SA.
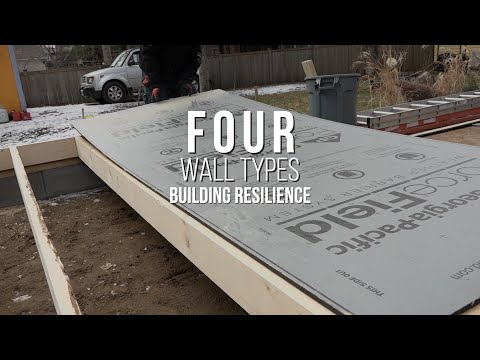
The last time on Building Resilience, we were installing thick sheets of Styrofoam in a basement that had almost enough headroom.
Self-adhered WRB seals against air leaks and provides water protection
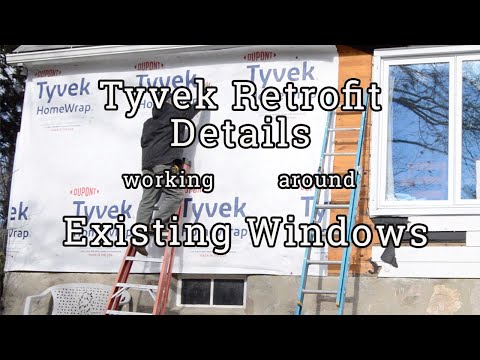
This week, the application at hand is water control. Specifically, Installing a WRB, the window flashing, and a rainscreen on this siding retrofit.
And because sequences of construction are not always ideal in remodeling, we installed some of the windows BEFORE installing the Hydrogap SA Weather Resistive Barrier (WRB).
That “SA” stands for self-adherence, and that means WRB is also the flashing tape.
But let’s back up and talk about what we’re doing overall and why.
MA:
- Existing conditions talk,
- Talk about the products we’re using
- How is it resilient?
Integrate the window flashing and air control with the Hydrogap SA
To get those first couple of windows in, Joseph cuts wide strips of Hydrogap.
He’s got a sweet little system here, where he’s got marks on the step that he can align a straight edge to after butting the Hydrogap SA into the riser.
I mean, it’s probably not exact enough to seal a piano, but we are not sealing a piano. We are sealing a window opening. Well, Steven is sealing a window opening.
He begins by tacking a piece of siding to the bottom sill. This pushes any water that leaks in, out, and away from the wall.
Now, he begins peeling his strips and placing them on the framing.
He does not worry too much about detailing the corners because these strips will be covered by liquid flashing. These strips are really just for tying into the WRB later.
He bridges the sheathing all the way back to the framing to eliminate sneaky air leak pathways, covering the sill, jambs, and window head.
And because he is bothering to install all of this stuff, he bothers to make sure it will stick.
The Hydroflash liquid flashing is applied over the window sill to seal the vulnerable corners.
I have filmed this process in the past and I am pretty sure he is going to need more than one bead of the HydroFlash, but let’s see what happens. It’s good that he want up the side, but it looks like we’re gonna need a little more blue on the window sill.
There we go.
The point of this is to create a monolithic layer of liquid flashing that will always seal the window sill against water. Sloping the sill first is a simple backup in the system because gravity always works.
It looks like he uses the nubs for a thickness gauge, but he checks his work with an ACTUAL wet mil guage.
After the Hydroflash has set up, he installs the windows, doing his best not to smack the window frame with his framing hammer.
He seals the window to the WRB with Flashing tape.
He carefully adheres the tape to the actual window frame, not just the flange. This will give a superior air seal, even if it is a little tricky to execute.
Now that the highest windows are installed, they turn to the easy stuff: installing rolls of self-adhered WRB to the low part with the help of many people.
Stick the WRB to a line, and smooth the wrinkles
The first step is snapping a line.
The next step is rolling out a boatload of Hydrogap.
And peeling off that top release sheet.
They all put the top of the sheet on the line and smooth it down. Because the adhesive is acrylic, it is easy to peel back and reposition.
It is very easy to pull gently from the bottom to remove wrinkles while smoothing the top part downward.
When the top section seems good, they peel off the lower release sheet and work the rest of the sheet in place.
This is a great wall to shoot the video on because of all the obstructions: vent duct, pipes, wires. Plenty of opportunity to illustrate how to seal this stuff right. Joseph bridges the wall sheathing and the duct boot with the SA, and Sol does the same thing with the wires.
Meanwhile, Sol is marking out the line for the next Hydrogap course.
The three-inch overlap is really easy to remember because there is a giant dotted line along the top of the sheet.
They climb their ladders to snap the line, and it is completely anticlimactic.
Boringest line snap ever.
Kicking the roll across the lawn makes up for it a little, but not much.
With the next course cut to length, the climb the ladders to stick it to the line— again, concentrating on getting the top of the sheet right, first.
Sol cuts around a roof return at the bottom of the gable, and just slowly anbd carefully works the WRB into place, before cutting off the excess.
With the top set, they peel away the bottom release sheet again and smooth it into place.
Once again, they roll the adhesive into the substrate’s surface topography and tie it into the window strips that the whole process started with.
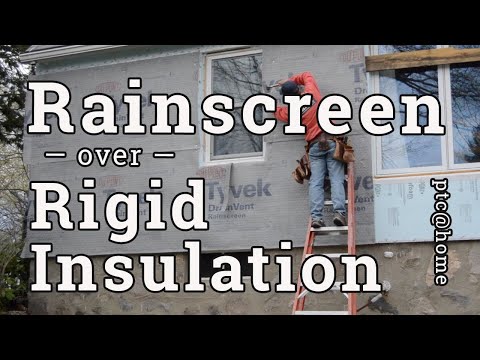
SlickerMax rain screen promotes drainage and drying behind siding
With the Hydrogap SA installed, the house is significantly tighter against air leaks and water leaks. But one more layer adds more water resilience: SlickerMax rainscreen. It is an entangled mesh that allows liquid water to drain down and out while allowing air movement in any direction.
Both of those things promote drying.
To install it, you basically align the bottom of the sheet where you want the siding to stop and smack a staple in the top.
Tuck the little flap under the bottom to keep the bugs out, and you can wrap it right around corners.
On this longer wall, Stephen gets a little optimistic about how much they’ll need to cover the wall, but Sol doesn’t say anything about it. He aligns the SlickerMax with the edge of the previous piece and slaps it with his stapler.
At the other end, Stephen’s optimism is starting to cloud over as he loses track of his feet.
That’s not true; he was working around those obstructions that Joseph was sealing earlier.
With the extra SlickerMax wrestled under control, they have another wall in the books, and Stephen heads off for a solo section.
tacking it in place, stapling it off, cutting around the windows, stapling it off some more, and neatly overlapping the bottom flap.
Again, at this point, the wall is already waterproof; the SlickerMax adds a layer of resilience to the wall system by letting water out.
The facing on this product is for mortar-based claddings like stucco, so layering the flap is unnecessary unless you want your customers to think you might give a darn about your work product.
Next Time: ForceField sheathing with integrated WRB
Speaking of giving a darn about your work product, We’re making sure the floor system is tight and clean because the boss is coming by this studio shed today, and she’s got her stuffed bunny with her.
After that, we’ll bend some flashings to use in walls with site-built exterior insulation panels. We’re using Forcefield sheathing from Georgia Pacific and Styrofoam XPS from DuPont.
After the walls are up, we’ll tape the seams tightly to keep the weather where it is supposed to be.
And that’s Building Resilience.