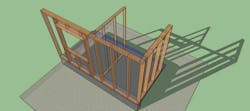
Beat the New Energy Code: 3 Steps to Better Walls
With the 2023 Energy Code in the books, some builders and remodelers will find their jurisdictions adopting updated versions of the old code they've been building to. When ProTradeCraft launched in 2015, the IECC had just been updated as well. The 2015 IECC required R values that eclipsed what you get by simply insulating between the studs.
In more climate zones, adding insulation to the outside of houses will become a reality. The 2021 code practically requires it in some climate zones. The 2015 code introduced testing with blower doors for air tightness.
If your jurisdiction is still running IRC 2003 or 2006, now is the time to step up your game on your own terms. If you stay ahead of the codes, you'll never be caught by surprise. You'll also be two steps ahead of your competition.
If you chase the codes, you'll let others dictate your business' profit potential.Don't be a dope—slope.
Step 1. Make walls watertight and airtight
Windows and doors are probably the biggest sources of leaks, either because of the actual window or door or the way it was installed. To reduce the effects of leaks in windows and doors, design a system that will collect any water that leaks in and direct it to the outside.
(See what we did there? Collect and direct? You're welcome.)Pan flashing on the sill plate will collect the water leaking into a window opening. Sloping the sill plate with a piece of beveled siding will direct the bulk water to the outside.
Beyond windows, other holes, like electrical outlets, hose bibs, wires, and dryer vents, are places for water to get in and air to leak out.
For very rainy areas or those prone to windblown rain, it is a good idea to build a rainscreen wall: one with an air space between the siding and the sheathing. This allows water to drain away after pushing past the first layer of protection.
Many layers of leaks mean you need many layers of airsealing
The challenge of tight construction is more than just where one piece meets another because it is a wall or floor assembly meeting another assembly. That means lots of lumber shrinking, swelling, and moving independently.
So you need to look at all of the gaps and be redundant in your thinking; focus on each layer of an assembly.
Air Barrier | er ˈberēər | noun
Any material that restricts the flow of air through a construction assembly. In wall assemblies, the exterior air barrier is typically a combination of sheathing and either building paper, house wrap, or rigid board insulation. The interior air barrier is often an interior finish, like gypsum board. — ENERGY STAR's Thermal Bypass Checklist
Some Dos and Don'ts for tighter walls:
- Don't leave big gaps between sheets of plywood. Tape the seams if possible.
- Do make housewrap part of the air barrier system. Seal the top, bottom, and sides of the housewrap, tape the seams, and integrate with window and door flashing.
- Do seal joints in framing with adhesive, caulks, gaskets, or canned foam.
- Do seal holes through walls. Implement the "You cut, you seal" rule: Whoever cuts a hole in the envelope is responsible for sealing it.
- Do use drywall as part of the air barrier system with caulks, sealants, gaskets, and foams.
- Don't forget about the big holes, like the sheathing behind a tub/shower unit. Because these units are often installed by plumbers during rough framing, no air sealing is executed.
Step 2. Make more room for insulation
Most walls are framed using 2x4s or 2x6s spaced 16 inches apart. As energy codes embrace HERS ratings, thermal bridging will become a much bigger deal.
By increasing the stud spacing to 24 inches, you can burn almost 30 percent of your thermal bridges.
Beyond just spacing the studs farther apart, there are other ways to eliminate extraneous wood:
- Design in 2-foot modules. Think about sheets of plywood when establishing dimensions, including roof pitch. This can save cuts, sheets, time, and money.
- Place windows and doors on stud locations when possible. This saves a stud per window and eliminates a skinny framing cavity next to the window or door, which is much more difficult to insulate well.
- Two-stud corners save one or two studs on each corner, and they make much better room for insulation. Cold corners often get moist and moldy.
- Reduce header sizes from "triple 2x10 for everything" to "what is needed to hold up the house." Then use rigid foam to pack out the header to the wall thickness.
Step 3. Fully insulate the walls
Batt insulation rarely fits a stud cavity the way it is designed to fit—tight on all six sides. Instead, there are usually gaps at the top or bottom and compressed sections at the edges or around wires and pipes.
Batts CAN be installed well, but it is difficult.
About the Author
Dan Morrison
Dan Morrison is a founding editor of ProTradeCraft.com, where he is also the editor-in-chief. Fun fact: Dan is also a founding editor of Green Building Advisor and executive editor of Fine Homebuilding.
