How to Pour a Foundation for a Room Addition with Kitchen and Bath
David Odell of Odell Complete Concrete in Southern California walks through the foundation for a room addition in Huntington Beach, built to serve as an ADU with a full kitchen and bathroom. The video covers demolition of the driveway and grass, digging footings with a Milwaukee cordless rotary hammer, wood stakes versus steel, footing and rebar specifications, epoxy dowels and special inspection, rechecking forms after the plumbers leave, screws versus duplex nails, a cold joint between concrete loads, and current California anchor bolt and square washer requirements. For more, visit the Odell Complete Concrete YouTube channel.
VIDEO TRANSCRIPT:
Hi, David Odell with Odell Complete Concrete. Today we’re going to be doing a foundation for a room addition. We’re also going to be removing some of this driveway. This is a typical setup in Southern California, with the garage out front and the back of the house sitting a little deeper. We’re going to bring the house out to about the front of the garage and make that another unit.
It’s actually an ADU, you could say, because it’s going to have a full kitchen and a bathroom, the whole works. A simple way to do these is to go with a basic bonus room with no plumbing, but in this case it has the whole package. We’ll show all of that in this video, including the removal and where the plumbing comes up through the slab when we get ready to pour.
Everything around the footprint has to come out down to native soil
The first thing you have to do is get rid of everything around it: the old concrete, the grass, roots, and debris. You have to get down to the native soil. This new addition stays out from the side of the garage about 8 feet. Your water main would probably be over in that area, going into the house from the meter at the street, so it won’t be in the way of this particular dig. It will be easy to tie in off that water main into this new ADU.
A block of wood lifts a flat Bobcat tire off the ground
Got a little flat tire here on the Bobcat. Easy to fix, though. If you have a block or a chunk of wood or whatever, you can pry the back of the machine up, and it lifts the tires off the ground.
The finished layout leaves a courtyard and a hallway-style passage
When it’s all said and done, we’re going to have a courtyard off that existing front door, which isn’t going to change much. It’ll be a courtyard-type area, and then a long passage between the new building and the garage, like a hallway.
A cordless rotary hammer with a clay spade digs these footings well
We’re digging this out with the Milwaukee cordless rotary hammer. We’ve got a clay spade on it, and it’s the go-to tool for digging this type of footing. It works nicely in this soil, which has no rock in it. This is Southern California, down along the coast, in Huntington Beach.
Wood stakes stay in the ground, and steel stakes have to be pulled
In this dirt, you can use wood stakes. There’s no need for steel stakes on this ground, and that’s nice for a foundation because you don’t have to pull your stakes out. You can just pour, and any stake that concrete locks in, you can snap off, and what’s under the ground stays there. With steel stakes, you can’t do that. You’d have to pull them out while the concrete is still wet.
Another nice thing about wood is that you can cut it off wherever you want. You can run the stakes wild high, or put your kickers on an angle going way in. You can leave a couple of long kickers to suspend your steel off the ground, hung by tie wire, or you can lop them all off and do it that way. There are a lot of options with wood.
The crew has been on the job the whole time
Here’s Doug and Augustino and Jose. They’re the three people who have been working on the job the whole time. Now Darren’s here. Doug and Darren, my two brothers, are going to be setting this up.
The footing is 15 inches wide, 20 inches deep, and heavily reinforced
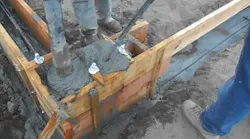
They’re using a 2x12 around the entire perimeter. Then you have your footing, which looks to be about 15 inches wide and about 20 inches deep. Then you’ve got number four rebar, and this one has a lot of steel in it. It’s going to have two number fours on top and two on the bottom, and then number fours in the slab every 12 inches.
It has a 10-mil Visqueen vapor barrier, with some gravel under that and sand on top of the plastic.
Epoxy dowels into the existing house call for special inspection
Where the new slab joins the house, underneath those big windows, it’s going to have rebar dowels, epoxy dowels, going in there. That’s going to call for a special inspection. There aren’t very many holes along the front of that house because it’s a short distance.
In some cases, you won’t need a special inspection. You could have the holes prepped and cleaned, and when the regular inspector shows up, he can observe you applying the epoxy and putting the dowels in. A lot of times they’ll want them in and signed off by a special inspector, but it depends where you are, who you’re working with, and what the schedule looks like for the inspectors.
Forms have to be rechecked after the plumbers leave
Once we get the forms completely set up, we have to pull off the job and wait for the plumbing to come in. When the plumbing is all in, we come back and see what forms they damaged, if any. A lot of times, forms come loose because plumbers are walking in and out of them, banging things around, and putting straps around the plumbing to hold it where they want it.
You have to double-check all your forms after the plumbers or anyone else comes in after you’ve left the job. If you don’t, and they’ve wrecked something or knocked a form down and scabbed it back up real quick, and then you’ve got concrete there, you’ve got a mess. Check that everything is undisturbed after they leave the job site, and then you’re good to go.
Low spots from the old sidewalk need underpinning
Now we’ve got to do a little underpinning because the whole pad area isn’t perfectly level. There’s a low area here where the sidewalk used to be, so we’ve got to underpin. Looks like a 2x4 and a 2x6 there.
Duplex nails come out of concrete forms more reliably than screws
They’re using a lot of screws on the form lumber, deck-type screws. I like duplexes. I’m not sure what Darren likes, but I like duplexes because they’re easy to get out, everybody always has a hammer, and they never break.
The other thing is that when you’re using screws and pouring concrete, the screws can fill up with concrete. You can’t get the screw out without cleaning it out or snapping it off. With duplexes you just don’t have those issues. They always come out.
I guess one advantage of screws is that you’re not disturbing the stake. When you’re pounding with a hammer, you can loosen it up, especially if you’re not very good with a hammer and you miss, hitting the stake instead of the nail or just being off on your strikes.
The first 10 yards barely cover a 5.5-inch slab with deep footings
There’s the big 5-foot fiberglass bull float, laid down flat. That’s one load, 10 yards right there. It doesn’t look like it, and it looks really small, but you’re looking at a five-and-a-half-inch-deep slab, and then you’ve got that massive footing all the way around. It eats it up.
A late cleanup load leaves a cold joint that the rebar can handle
They’re waiting on a cleanup load. They didn’t order them back to back because it’s hard to calculate these jobs with these footings. The footings vary a little in width and depth, and that can change how much you want to order. In this case, they poured one load, measured up what they needed, and called it in. It took a while to get back, because they were already kneeboarding the first load by the time the second load arrived.
So they got a pretty good cold joint there, and a cold joint isn’t that crucial in this scenario because you’ve got all that rebar at one-foot centers. Even if the two loads don’t mesh together really well and you get a crack at that cold joint, it won’t matter much, because all of that rebar will keep it from moving. As soon as you start throwing flooring over the top, it’s not going to matter.
A few interior-wall bolts get set with a string line
They ran a string line for the interior wall, where you can see a couple of bolts sticking up. They pulled the string line right where that wall is going to go and dropped in a few bolts, and there aren’t many. I think there are only about three or four. That was a pretty easy setup.
On a bigger slab with a lot of interior bolts, you’ll frame the whole building and then drill and set Red Heads or expansion bolts, maybe even epoxy in some all-thread, to tie down those interior walls.
A mirror finish shows the slab is very smooth
You can see that first section there. They’re putting water on top, and it’s so hard already, and it has a mirror finish on it. See the reflection in that? That means it’s very smooth.
California now requires galvanized 5/8-inch bolts and square washers
These are all 5/8-inch bolts, and I believe they’re all galvanized. It’s a fairly new requirement that they want all galvanized bolts now, at least in California. There’s no such thing as half-inch bolts anymore. It’s 5/8 and above.
I remember when they were 6 feet on center in California. Now they’re at least 5/8, galvanized, and the maximum spread you’ll probably see is 4 feet. With all these strong walls and different details, you’re usually at about 3 feet to 20 inches of spacing on bolts, something like that.
Then, of course, you’ve got square washers now instead of round ones, and they’re 1/4 inch thick, so the plate can’t pull up through them.