Editor's Note: This video is a BOWA internal training seminar for site superintendents on best practice steps for wall claddings. We thank them for posting the video and the technical review of this article.
Wall Claddings is a somewhat complicated name for the stuff on the outside of a house. In plain language, we're talking about siding, stucco, stone, and brick.
This is a Supervisors Guide because this is not an in-depth how-to guide, but rather a 'what you need to know' guide. BOWA strives for 'better than normal' construction practices, and most of our subs know this and know what better than normal means. Some subs are new to us or some of their people are new to the trade and don't even know what normal is.
It is incumbent on supervisors to explain why they are expected do what we expect them to do, so that there are no issues with their work down the road. It gets us what we want the first time and it gets them no expensive callbacks and repeat business.
Agenda:
- What's behind the cladding (1:40)
- Siding (17:38)
- Exterior trim (29:15)
- Stucco (37:36)
- Stone and Brick (46:25 and 51:21)
1/ What's behind the cladding? (1:40)
House wrap
We have talked about How To Install House Wrap #TheRightWay, in earlier sessions, so we won't dive deep here. In a nutshell,
- Fully applied WRB, properly overlapped and sealed at the seams.
- All Claddings leak, so WRB must actually work. In fact, houses should be water tight before siding goes up.
- Some claddings, like brick, or other masonry claddings that hold water—called reservoir claddings in geekspeak—need a second layer of WRB; we use felt. When felt gets wet, it wrinkles, which creates an air gap / capillary gap / drainage path. This gap and path allows water that gets behind the siding to drain out.
Because water gets behind siding.
Rainscreen
Allowing water to drain out of a wall behind the siding has a few terms, most of which mean the same thing. Rain screen, drain screen, drain space, drainage gap, vented siding, pressure-equalized ventilated cladding ...
It all means a space where water can run down and get out. an air space is required behind some claddings, and it is built in to others. Either way, it allows the siding material to dry out a lot faster and generally makes things better for everyone involved. There are almost as many ways to accomplish it as there are terms for it.
- Polyethylene mesh, like Cedar Breather, allows you to install siding against it without compressing. It is also available with a fabric backing to prevent mortar invasion for stucco applications. It costs about $1.50 sq ft installed for the fabric-backed version, the other version is less expensive.
- Bumpy house wrap, like Drain Wrap or HydroGap, which have wrinkles or bumps in them. The wrinkles and bumps are very thin, 1/16 inch, so there is some question as to whether they really promote drainage. Of course something is better than nothing, so ... But here's the big but: house wrap has a primary job to do as the WRB and part of the air barrier system, before it gets to moonlight as a three-dimensional water flow network. Make sure it can do its primary job before it moonlights as a rainscreen.
- Furring strips—works great, significantly adds to labor- good choice for projects where exterior insulation is part of the scope. Can be wood, pre made strips, or Coraplast run through a table saw.
- Protect the bottom of the wall with bug screen. You can cut long rolls with a chop saw.
- Allows sideways airflow
- Strips of sill sealed also work as spacers — and thermal breaks.
- Dimple sheet membranes, like DELTA DRY, allow airflow and drainage on both sides of the sheet: exterior water can drain, and moisture can escape from the inside of the wall, too. This product is fantastic and it is expensive. These sheet membranes are excellent at promoting ventilation behind brick.
When is a rainscreen necessary?
For a normal house in Northern VA, a rainscreen is not needed behind lap siding. In wet climates, yes. In places with sideways rain, yes. In the suburban mid Atlantic region—away from the coast— lap siding tends to do very well at stopping water. However, vertical or diagonal siding does not.
Vertical and diagonal siding installations seem to leak a lot. Another situation that we have found needs a rainscreen is on synthetic trim panel designs—like for a sunroom. These synthetic materials cannot allow moisture to pass, so it is important to make a path for water to pass.
Reservoir claddings, like brick and stucco, absorb water, so they need a place to let it go.
The production manager should make sure all of the materials for this are included in the bid and the project manager should verify that it actually gets built this way.
2/ Siding (17:38)
Wood siding
The Western Red Cedar Lumber Association's cedar siding guide is a great resource for installing cedar siding.
Some common problems with wood siding:
- Not back-priming the wood. If a lot of water gets into the wood, and the wood is not painted on all sides, extractives from the wood can penetrate the house wrap, change its properties, and water can get through the house wrap and into the house. If you back prime the wood, this is not an issue.
- Not keeping the siding dry before installation. Wet wood expands, so the joints will open up when it dries out before painting.
Some key points to wood siding installation:
- Use spiral or ring-shank nails that will drive 1 -1/4 inch into the framing.
- Use hot-dipped galvanized nails for siding that will be painted.
- Use stainless steel fasteners for siding that will be stained. Otherwise there will be black spots around every nail.
- Should each nail go through one piece of siding or two? WRCLA Guide says to nail through a piece of siding above the piece below it, thereby only nailing into one piece at a time. But we all know that it doesn't do anything wrong to nail through two for most of the siding we install (6 in.). BUT, we've had problems nailing through two pieces on jobs where the siding was very wide (10 inches). The top of each course split where the nail penetrated the top and we had to replace the whole darned thing.
- Keep wood siding at least 2 inches off the roofing. This is the same recommendation as for fiber cement and stucco. That's why we use a piece of metal trim (such as copper Z-flashing) to run up the rake and cover the gap. It is worth talking to the homeowner about this because they are sometimes surprised by the look of houses that won't rot.
The Cedar Shake and Shingle bureau has a good guide on installing their products, called the Exterior and Interior Wall Manual. Two main points:
- Follow the exposure and fastening directions
- Use Cedar Breather, or similar — it is great for paint and shingle longevity.
- They recommend installing over plywood or dimensional lumber. Translation: Use OSB at your own risk.
Fiber cement
We use a lot of Hardie siding and it has a great track record here in the metro DC area. I know people who have had problems north of here with freeze-thaw issues. Here in DC, we use it and we install it per the directions. This is a great book that you should carry with you.
Key points for Hardie fiber cement siding installations:
- Keep 6 inches above grade
- 2 inch clearance above roof or stairs
- Flashing behind joints, over studs.
- Seal all of the cut edges.
- Blind nailing pattern: hit the nailing line that is 3/4 inch below the top of the board. Don't nail too high or the board will flap.
For vertical Hardie siding:
- Use 2 inch nails rather than 1-1/4 inch nails
- If installing over furring strips, furring strips need to be much thicker than normal due to the extra holding power required.
- Hardie has a great head trim detail for windows in board and batten walls
Synthetic siding
- PVC and other synthetic sidings are relatively new, and a bit expensive, so make sure to follow the directions for nailing pattern, drainage gaps, etc.
- These materials are impermeable, so they will not allow what is behind them to dry.
- Must include a ventilation space
- Vinyl siding and aluminum are different in that there is air space built into them, so air can move and water can drain.
3/ Trim (29:15)
Synthetic trim, such as Boral, Hardie, PVC holds up better than wood trim. Especially if the trim design is complicated, like on a frame and panel design.
Panel best practices
- Treat them with a lot of respect. They are going to let water in.
- Hardie panel is a great choice for the inner rectangle (thin, permeable, less expensive).
- Include a vent space behind the trim.
Dealing with PVC trim movement and joint openings
- Explain to the clients that they can have trim that rots, trim that is very expensive, or trim that is affordable, but moves.
- Use short pieces, overlap layers to hide future gaps.
- Add layers to hide joint movement. Wide trim strips can cover big gaps.
TrueExterior trim
Limited sizes, expensive, it seems to work well, but it is brittle. If you drop it the trim may break into multiple pieces. Make sure to tell the painters not to sand their putty holes because it will remove the wood grain
4/ Stucco (37:36)
The keys to stucco is not in the stucco, it is the stuff below the surface.
- Water management
- Lath and reinforcement
The Minnesota Lath and Plaster Bureau has a great guide to stucco which is awesome. To keep it simple at BOWA, we use tow variations of the same system
- Tyvek + felt + a drain gap material on most stucco buildings.
- Tyvek + felt on small, well sheltered buildings.
- StuccoWrap is a nice upgrade for the first layer, but it requires switching to 3 inch tape and it is more expensive.
"These houses are going to be around a lot longer than we're going to be watching the caulking."
How to terminate the bottom of the stucco:
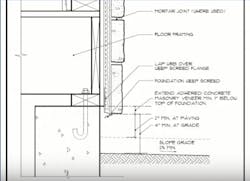
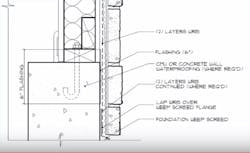
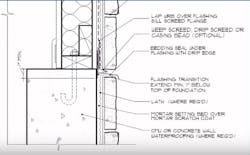
Weep screed is required by the IRC. You can transition to a different material, which is easier on the eye or you can continue with stucco below the weep screed. Either way, it is another situation where managing the expectations of the customer is important. Most people do not picture a weep screed when they picture stucco.
Lath and reinforcement (41:16)
- Fasten lath into the studs
"All of the books I have ever read say that staples for lath must go into studs. But half the guys we work with just staple it all over the place. It can be frustrating to make them go back and nail into the studs, and I don't know how important it really is, but I also don't know why they don't just do it the way the instructions say to do it."
#RTFM
- Install corner pieces over the field pieces, not under them.
- Overlap lath 2 inches and offset the joints
Install movement joints—or don't.
The commercial books say to install control joints every 18 feet, but most houses would look foolish that way. We always install horizontal control joints at the floors, because there tends to be a lot of movement there, but for vertical control joints, we usually ask the clients to sign off on omitting them on areas larger than 144 square feet, in favor of accepting a few little cracks.
Use casing bead at the window openings to provide a surface to float the stucco to. Casing bead also provides a 3/8 inch space to caulk.
Synthetic stucco does not mix well with water, so it is critical to manage the water. BOWA has had a lot of issues with acrylic stucco.
Stone (46:25)
Masonry Veneer Manufacturers Association Installation Guide and the Adhered Natural Stone Veneer Installation Guide are two excellent resources full of good details.
"Stucco with rain shelves"
—What building scientists call adhered stone
Our general layers are Tyvek + Felt + Drainage mesh material. For projections that extend more than 2-5/8 inches use a steel support angle to carry the extra weight. Bottoms of walls are a little more difficult to detail.
Some manuals call for keeping the stone above grade, by about four inches, but that just looks dumb:
Bushes can help.
Some allow stone all the way to grade, including the drainage system:
We do something in between.
We install a horizontal weep screed above the grade with through-flashing to direct all of the water out, and then we continue the stone below the flashing.
It looks like this in real life:
Brick (51:21)
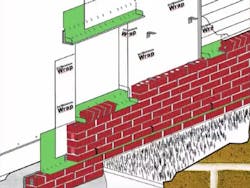
Guide to Inspecting Residential Brick Veneer is a fantastic manual with great detail drawings. Brick is a reservoir cladding, so it needs two layers. Tyvek + felt. The drainage mesh is not needed because there is already a gap between the brick and the felt.
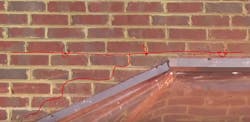
Think about masonry as a stack of sponges. When they get wet enough, the water is heavier than the sponge's ability to hold water, so the water moves down to the bottom of the wall. If there is nothing to collect the water and direct it out, the wall will rot.
Through-flashings collect and direct at these locations
- Base of wall
- Rowlocks
- Lintels
- Roof lines/bay windows
The first three locations are straightforward. The fourth is more angular.
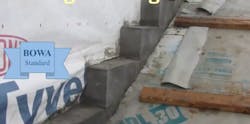
Step 1: Insert masonry steps above the roof line.
They must be even or they will look silly.
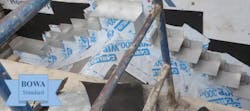
Step 2: Cover with flexible flashing and metal flashing pans
With the peel and stick membrane, the wall is waterproof. The metal protects the peel and stick from UV damage and extends through the brick course to tie in to the step flashing.
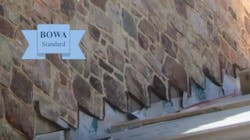
Step 3: Install masonry:
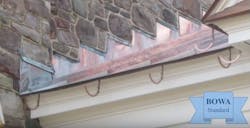
Step 4: Install step flashing and counter flashing, bending the metal pans over the counter flashing.
Bay windows:
You can either run a strip of through flashing over the entire bay roof with weep holes, or step down the sides of the bay window roof, depending on your budget.
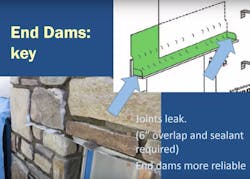
One more tip in two words: end dams.
On the ends, and even on joints of long horizontal runs.
Materials that work and some that don't:
- Grace Perm-A-Barrier: a green membrane that works great.
- Carlisle CCW-705: A blue membrane that works great too.
- Hohman & Barnard TeXtroflash: White woven face, gray sticky back. Works great.
- Henry Blueskin TWF yellow/green flashing material.
All of the above materials are made to be through wall flashings and they work very well.
In our area a product called York PVC flashing material is common and not good at being a through wall flashing. To be fair, it says on the label "Not for use as a masonry through-flashing ... "
But you know that thing about contractors and labels, right?
Weep holes at the bottom of the wall
All that water that is collected must be directed out through some type of hole.
- Corrugated plastic weep channels from Masonry Technologies Inc
- rope is the traditional choice, but not the most effective. The books say to space it every 16 inches.
- Mesh mats that fill the head joints in place of mortar
Brick ties and anchors
Hot dipped galvanized will last about 25 years on a house. If you expect the house to last longer than that, it may be worth upgrading to stainless steel anchors, which will add a few hundred bucks to the budget of a house.
New siding systems, like gapped screen types and panel systems, have their own issues, so be skeptical and look at the basic info covered here before diving in head first. When building with SIPs, which are not nearly as uncommon as they used to be, always use a rainscreen system. They are structural panels, the OSB outer skin is part of the structure, so it is imperative to protect it from water damage.
Make your own Best Practice Book:
- The Western Red Cedar Lumber Association's cedar siding guide
- Cedar Shake and Shingle Bureau's Exterior and Interior Wall Manual
- James Hardie Installation directions
- The Minnesota Lath and Plaster Bureau's Guide to Stucco
- Masonry Veneer Manufacturers Association Installation Guide
- Adhered Natural Stone Veneer Installation Guide
- Guide to Inspecting Residential Brick Veneer
About the Author
Doug Horgan
Doug Horgan is a Vice President of BOWA, a Design, Build, Remodel, and Consultation company with offices in McLean and Middleburg, Virginia. Doug is also one of ProTradeCraft's technical advisers.
